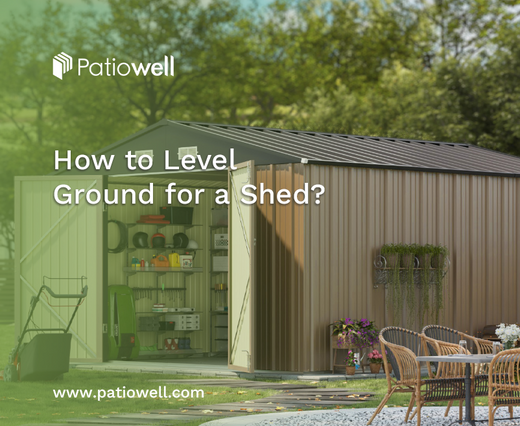
Wondering how to level ground for a shed? Many people plan on installing a shed in their backyard only to realize it is uneven or sloped. This is quite a common problem that may increase the difficulty of building a shed and potentially lead to further problems, such as instability or water damage.
But don't worry, this article has an easy, simple guide on how to go about having your ground leveled with your shed standing securely over it, for years in, and years out.
Table of Contents:[hide]
Why Should You Level the Ground for a Shed?
There are many important reasons for leveling the ground for your shed. The most important ones are:
- Stability: A level surface keeps your shed stable, and it won't shift or lean with time.
- Prevents Damage: Without a level base, the doors and windows will not be able to work correctly, and the shed might lose its shape.
- Good Drainage: If the ground slopes, then water will accumulate around the shed and cause some damage. Leveling helps water run off.
- More Durable: A strong, even foundation saves your shed from water, rust, and other troubles, thus letting it live longer.
In that sense, by leveling the ground, you will be assured that your shed is strong, functional, and will last long. Now let's learn how to level ground in detail.
How to Level Ground for a Shed
Leveling the ground for your shed is pretty straightforward if you follow these steps:
Step 1: Choose and Mark the Shed Location
Start by picking a flat area where you want your shed. Consider sunlight, accessibility, and any local building codes. Once you've decided, mark the area with stakes and string to outline the shed's footprint.
Step 2: Clear the Area
Clear the marked area from debris, rocks, plants, or weeds. This provides a clean and clear space to deal with and makes leveling work easier.
Step 3: Assess the Slope and High/Low Spots
Check the land's slope using a leveling tool, like a long spirit level or a laser level. Find the various high and low spots so you may know where to dig and fill.
Step 4: Excavate High Spots
Fill in the high spots to create a more even surface. Use a shovel or a small excavator, depending on the size of the area and the unevenness.
Step 5: Fill Low Spots with Gravel or Soil (if necessary)
Fill the low spots with gravel or soil to bring them up to height. If you have a choice, gravel is especially good because it aids in drainage too. Spread it on, using a rake.
Step 6: Create a Level Surface
When the ground is reasonably level, take a rake or shovel and work the ground over to be as smooth as possible. Take your level tool and check the surface to get it as level as possible.
Step 7: Install a Layer of Gravel (Optional)
You can also put in a thin layer of gravel for extra stability and drainage. This is optional, but highly recommended for places that are normally covered in mud or water.
Step 8: Check and Recheck
Check the level of the ground again before you move further. Take a level tool and ensure that the whole area is even. Go ahead and make adjustments or remove the material, whichever is needed.
Step 9: Lay Foundation Materials
Place any materials that form the base down so that the ground is even. These could be concrete blocks, timber beams, or even a bed of gravel, depending on the type of foundation that your shed will have.
Step 10: Prepare for Shed Installation
Level the ground and lay the foundation, then you can start building your shed. Ensure everything is secure and in proper alignment before installation.
Just these few steps will get you a great, even foundation that can help your shed stand firm for many years.
Ways of Levelling Ground for a Shed
Depending on your needs and available materials, there are a couple of ways to level the ground for your shed. Some common ways include:
-
Basic Soil Excavation and Leveling
This is the most straightforward approach. One digs out high spots, while the low spots get filled with soil to flatten the area. Once the ground is even, the raker or shovel comes into play. This method will be when the shed to be erected is small or if the slope is minimal.
-
Using a Layer of Gravel
Laying a layer of gravel on top helps to level and will also be very useful in case of drainage problems, particularly on the ground that does stay damp. Once the soil is leveled, cover it with a layer of gravel and compact it for a stable base.
-
Using Concrete Pavers or Blocks
You may place concrete pavers or blocks to provide a level ground on which your shed will sit. That works very well when the ground is uneven, but you would not like to dig and fill excessively. Concrete works as a good base, and you can adjust pavers according to need.
-
Building a Timber Frame Foundation
If you want a more solid and durable base, you can construct a timber frame. Put on pressure-treated timber around the edge of the shed site, and fill it with gravel or soil. This is another good option in case you want a higher base for good drainage.
-
Concrete Slab Foundation
A concrete slab is a solid, permanent foundation for your shed, in which you will have to dig the ground and install a form to be able to pour concrete for a slab. This is very suitable if you have a larger shed or want maximum stability and durability.
-
Using Adjustable Decking Piers
Decking piers are a good option if you have uneven terrain and would like an adjustable approach. These piers can be adjusted up or down to meet the slope of the ground to level your shed. They also provide good airflow under the shed, which can help with ventilation and moisture control.
-
Sand Leveling Base
A base of sand could be implemented in areas of the backyard that are very loose or highly uneven as it could level and create a flattening space for your shed. What it will do is help to somewhat fill in any low areas, thus creating a very easy and flat surface upon which a shed can be set. In addition to being an affordable base sort, it's good down tetracycline draining and would be just fine against moistened areas.
Each has its merits, and which will be the best for you depends on the size of your shed, the conditions of the ground, and how permanent you want it to be.
Conclusion
So, that's how to level ground for a shed. Leveling the ground is important to make your shed stay put and last longer. Whether you dig and level the soil, add gravel, or use a concrete slab, taking the time to get it right will help avoid problems later.
Following the steps in this guide, you'll be ready to set up a strong foundation for your shed.
Diana Mason
Hi there! I’m Diana Mason, the chief editor of Patiowell brand. With over 15 years of diving deep into the world of outdoor furniture, I’ve developed a keen eye for what makes outdoor spaces truly special. I love sharing tips and inspiration to help you create your perfect backyard retreat. Our blog is a reflection of my passion and expertise, featuring only the best pieces that I personally vouch for. Thanks for stopping by—I can't wait to help you transform your outdoor living space!


Leave a comment
All comments are moderated before being published.
This site is protected by hCaptcha and the hCaptcha Privacy Policy and Terms of Service apply.