


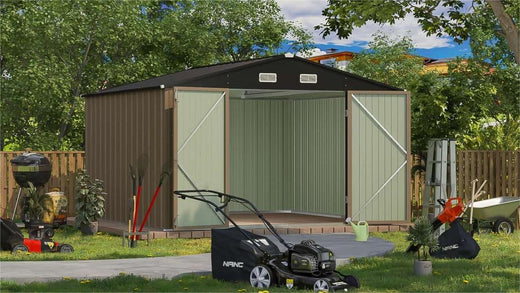
Now that you are the proud owner of a brand new 4x6 plastic shed, you want to ensure it lasts. Our plastic garden sheds are a fantastic, easy-to-install storage solution.
Table of Contents:[hide]
With a lifetime warranty, you can be confident of their supreme quality and durability, providing many years of reliable storage. However, like any other part of your home, a garden shed will benefit from regular maintenance and care.
Whether you use your garden shed for storage or have made it the pride of your garden and a cool place to hang out with ourshed decorating ideas, these shed maintenance tips will ensure it can weather the rigors of time.
1. Check the Condition of Your Shed

If you've neglected your shed for a while, the first step towards reinforcing it and giving it a new lease on life is to check its current condition.
Closely examine your shed for any signs of weakness, damage, or other areas that could do with some attention. Depending on the age of your shed, there may be cracks, warping, leaking, or other signs that the structural integrity is degrading.
Pay special attention to the walls, doors, and foundation. Vulnerable areas will need the most reinforcement.
What’s the climate like in your area, and how exposed is your shed? Is it frequently exposed to high winds, sunlight, snow, high or freezing temperatures, and other extreme conditions?
Is it in a location where there is a lot of falling debris? Our plastic sheds are built tough, but even the sturdiest of sheds can strain from the weight of a few months worth of dead leaves, twigs, and branches.
When you have an idea of your shed's condition, you will have a good foundation to work from in reinforcing it so it can continue to give you decades of secure storage.
2. Install Your Shed on Concrete Flooring
Many owners of small plastic sheds don’t bother installing them on a concrete foundation, but it's highly recommended, especially for larger, heavier-duty 8x6 plastic sheds. The earth underneath your shed is constantly moving, stressing the walls and roof of your shed and eventually compromising its structural integrity.
A robust concrete floor will reduce stress on the walls and roof and make your shed more secure. For maximum durability, consider a concrete floor with rebar anchors.
Installing a concrete foundation isn't difficult and requires minimal tools. However, if you aren't comfortable doing it yourself, consider hiring a handyman. Another option is to install your shed on a foundation of good-quality pavers.
3. Use Metal Brackets
A concrete foundation may be overkill for a small 4x6 plastic shed, but you can still make it a little more robust by using metal brackets to secure the walls to each other and the floor. All you will need for this job are a screwdriver or attachment for a power drill, a marker, and a level. Locate potential weak spots around the plastic walls, which will most likely be on the roof and corners.
Mark where each bracket should go and use a drill to make small holes in each weak spot. Next, run a screw through each of the holes to secure the bracket. Pay attention to the length of your screws, as you don't want them too long, or they will poke out the other side.
4. Use Thicker Screws
After a few years of braving the elements and strong winds, the screws in your plastic shed may become loose. You can quickly fix this by using screws of a similar length but ones that are a size bigger.

You could also attach shelves to the shed walls, which have the added benefit of creating a rigid barrier. Plenty of plastic shed shelving options are available, but L-shaped or angle brackets are the most common. These items are available at all good hardware stores and are a very economical fix for loose and leaking shed walls and roofs.
5. Stop Your Shed from Blowing Away
Metal and plastic sheds are in danger of turning into a dangerous projectile during storms and high winds. If you live in an area that regularly experiences strong winds, consider installing hurricane tie-down straps to anchor it in place. You could also ensure there is always a tarp handy that you can use to tie down over the shed, keeping it dry and firmly anchored during severe weather.
6. Use Rubber Washers
You can screw into a plastic shed to add shelves and other accessories. However, always make sure you use the right-sized screw. If you are screwing from the outside of the shed, you should use rubber washers. These will ensure that every screw hole is watertight against even the heaviest downpours.
7. Seal and Paint Your Shed
Our plastic garden sheds snap together with a tight fit, but you can never go wrong with a bit of do-it-yourself weatherproofing around the joints and seams.
Apply weatherproof sealant or silicon to all joints to prevent seepage during wet or snowy weather. A coat of UV paint will also add an extra layer of protection against the sunlight if your shed is in an exposed position in the garden.
8. Keep Your Shed Clean
A clean shed is a happy shed. Give your shed a hose down every few weeks, and keep the roof free of debris. This will allow you to regularly assess the state of the shed and address issues as they appear and before they become more significant problems.

9. Proper Ventilation
Good air ventilation inside the shed is the key to preventing mold and mildew buildup. Our plastic sheds come with pre-installed vents, but regular brushing is a good idea to keep them free from dust and debris buildup.
Maintain Your Shed for Reliable Storage
Purchasing a high-quality 4x6 or 8x6 plastic shed is the first step towards reliable garden storage. However, even the toughest sheds can succumb to the weather and neglect. Maintenance, occasional TLC, and using one or more tips will ensure your garden shed is safe, secure, and long-lasting. For more shed, garden, and outdoor living tips, visit our blog, where we keep you up to date with the latest storage tips and advice.
Diana Mason
Hi there! I’m Diana Mason, the chief editor of Patiowell brand. With over 15 years of diving deep into the world of outdoor furniture, I’ve developed a keen eye for what makes outdoor spaces truly special. I love sharing tips and inspiration to help you create your perfect backyard retreat. Our blog is a reflection of my passion and expertise, featuring only the best pieces that I personally vouch for. Thanks for stopping by—I can't wait to help you transform your outdoor living space!
2 comments
Diana Mason
Hi there,
Let me confirm: do you need more screws, or are you missing screws from your package? If you need more, please refer to the product installation guide you received; it will have a detailed description of the type of screws you should use. If the screws are missing from the package, please contact our after-sales service at saleservice@patiowell.com, and we will send them to you for free.
MJ Brown
What type of screws can I use on the inside of my Patiowell resin shed ?
Leave a comment
All comments are moderated before being published.
This site is protected by hCaptcha and the hCaptcha Privacy Policy and Terms of Service apply.