


Introduction
Here is your ultimate guide to the best way to construct a suitable foundation for your shed! Whether you need a sturdy metal shed that is steadfast or a flexible plastic one, building a strong foundation is a must. A solid base not only gives your shed stability but also protects water and even soil movement, hence boosting the shed's long life span. Through this detailed manual, we'll break down the process step by step and make sure everything is understandable.
Mastering the Ins and Outs of a Good Foundation
One may begin with the prerequisite of why an excellent foundation is crucial. A foundation serves multiple purposes: it helps you level and stabilize your shed, prevents moisture from rising, and protects the base under your shed from direct contact with the ground that may cause rottenness in wood, rust in metal, or warping in plastic. Generally speaking, the basic remains the goal of a durable shed.

Step 1: Planning & Preparation
Choose a place that has flat and well-drained ground. Try to avoid the accumulation of water in low places. You will be more productive in the right location, easing the rest of the process and ensuring your shed remains dry and standing.
- Concrete Slab: Suitable for the construction of large or heavy-duty sheds designed to ensure a steady and smooth base.
- Gravel Pad: A better alternative, being low-priced and suitable for small sheds, providing optimal drainage and stability.
The kind of foundation you want will determine your needed supplies and gear. To have a concrete slab, you need a concrete mix, rebar mesh or mesh as a reinforcement, wooden boards for formwork, and tools for mixing and spreading concrete. You will need landscape material, gravel, and tools to level the ground for this kind of pad.
Step 2: Preparing the Site
Take out the grass, stones, and any other scattering. Employ the shovel and rake to surface grade the soil as well as possible. To build the floor on a firm base, dig to the recommended depth of 4 inches for a shed and then create a wooden form to keep the concrete. Landscaping fabric is very useful for a gravel floor because it will keep weeds from creeping in through the base materials.
Step 3: Constructing the Foundation
For a Concrete Slab:
- Mix and Pour the Concrete: Note the concrete mixture instructions. Evenly distribute the concrete into the mold and fill it up.
- Smooth the Surface: Apply the trowel when smoothing the concrete surface. Use a sloping board to level it by screeding it.
- Let It Cure: Ensure the concrete is cured for at least 48 hours before taking off the forms. Wait about a month after pouring concrete before constructing your shed on top of it to give it time to be fully set.
For a Gravel Pad:
- Lay the Landscape Fabric: Cover the cleared space with landscape fabric and cut it to shape it.
- Add the Gravel: Spread gravel over the fabric to form a level cover. Aim for a depth of approximately 4-6 inches.
- Compact and Level: Pack the gravel using a hand tamper or a plate compactor to form a firm base. Make certain the surface is level.
Step 4: Building Your Shed

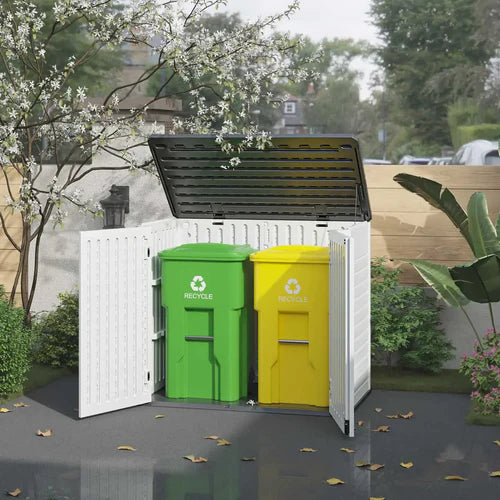
When the foundation is ready and has been fully cured or settled, you can continue by assembling your shed. It doesn't matter whether you are building a metal shed or a plastic shed; follow the manufacturer's instructions accordingly. Ensure that every part is in place and that you have everything you need to start assembly before beginning the process.
Improving and Protecting the Foundation of Your Shed
Once your foundation is done and you've assembled your shed, there are additional measures you can take to develop and safeguard your investment. This phase is important for keeping the shed in good condition, irrespective of whether you choose a metal or plastic shed type. This is where our drainage improvement, protection of the shed foundation from weather elements, and maintenance of base stability will be discussed.
● Improve Drainage Around the Foundation
Proper drainage is an essential barrier against water damage to your foundation. Put a gutter on your shed and connect the downspouts to a channel that will take water away from the foundation. Also, you might be interested in having a slight slope along the shed's perimeter so that the water will be carried away from the foundations.
● Employment of Protective Coatings and Sealants
Waterproof sealing may be a perfect solution for concrete deterioration from moisture and cracking. For gravel foundations, pay attention to the quality of the landscape fabric, which is high enough to be resistant to tearing and degrading with time.
● Anchor Your Shed
Most particularly, if you live in a habitually windy or stormy area, you can avoid your shed from being tipped by fastening it to the foundations. Certain anchor systems are established just for metal and plastic sheds, respectively, and these can be easily fixed to offer additional security despite harsh weather.
● Regular Maintenance Checks
It is recommended to periodically check the foundation for any indications of shift, erosion, or damage. In doing so, short-term issues are resolved before they escalate into long-term problems. See to it that the ground around your shed is free from fallen branches and weeds that can retain moisture or attract pests.
Conclusion
Congratulations! Now, you have the essentials you need to start your shed project without worries as you will be amazingly confident! By conscientiously applying a concrete slab to your metal shed and similarly using a gravel pad on your plastic shed, you're determining success from day one. In the same way, the foundation matters as the structure itself; therefore, do not be in a hurry. Take your time and get it right. A well-designed and well-constructed shed can not only withstand years of wear but will also give you practical storage space. Happy building!
Diana Mason
Hi there! I’m Diana Mason, the chief editor of Patiowell brand. With over 15 years of diving deep into the world of outdoor furniture, I’ve developed a keen eye for what makes outdoor spaces truly special. I love sharing tips and inspiration to help you create your perfect backyard retreat. Our blog is a reflection of my passion and expertise, featuring only the best pieces that I personally vouch for. Thanks for stopping by—I can't wait to help you transform your outdoor living space!

Leave a comment
All comments are moderated before being published.
This site is protected by hCaptcha and the hCaptcha Privacy Policy and Terms of Service apply.