


Have you been dreaming of building a barn-style shed with a gambrel roof but don't know where to start? How to build a barn that's both functional and stylish can seem like a daunting task, especially when faced with all the technical details.
Table of Contents:[hide]
Whether you're an experienced DIYer or a beginner, we'll make sure you have all the information you need to create a barn-style shed that will meet your storage needs and look great in your yard.
How Wide Do You Want Your Gambrel Shed to Be?

Before getting straight to the construction of your barn-style shed, the first thing you need to decide is how wide you want the structure to be. The width of your shed will determine a lot about its overall design and functionality. It's important to carefully consider this decision based on what you intend to use the shed for.
If you're planning to use your shed for storage, think about how much space you need to store lawn equipment, tools, or even a small vehicle. If the shed is for livestock or as a workshop, you'll need extra room for movement and workbenches. Consider also the available space in your yard, as you don't want a shed that's too large for the area.
Here are a few things to consider when choosing the width of your gambrel shed:
- Functionality: The width will affect the internal layout. A wider shed gives you more floor space to organize items, or room for workstations or even loft areas.
- Budget: Wider sheds require more materials, which means the project will be costlier. Make sure to balance your needs with your budget.
- Aesthetic: A wide shed may look more impressive, but it might also take up too much space in your yard if it's not proportionate. Keep the visual balance of your property in mind.
Once you have an idea of how wide you want your gambrel shed to be, you can move forward with the other important design decisions. Keep in mind that the size of your shed will also influence the rest of the planning, like the number of trusses, roof pitch, and overall structure support.
What are Gambrel Truss Pieces?
If you're building a barn-style shed with a gambrel roof, understanding the role of gambrel truss pieces is essential. But what exactly are these pieces, and why are they so important?
Gambrel trusses are the structural elements that form the framework of your shed's roof. They're specifically designed for gambrel roofs, which feature two different roof pitches — a steep upper slope and a shallower lower slope. This unique design allows you to maximize headroom in the loft area while maintaining the classic barn-style look.
Here's a breakdown of the key components of a gambrel truss:
- Top Chord: This is the upper part of the truss that forms the steep, upper slope of the roof. It's usually made of long, sturdy lumber to support the weight of the roof and prevent sagging.
- Bottom Chord: The bottom chord forms the lower, shallower part of the roof slope. It's the part of the truss that helps create the barn-style roof shape and connects to the walls of your shed.
- Webbing: The webbing consists of smaller pieces of lumber that connect the top and bottom chords. They provide additional support and stability, ensuring the truss can hold the weight of the roof without warping.
- King Post: This central vertical piece is used to further strengthen the truss and reduce any potential twisting. It's not always necessary in every gambrel truss, but it's often used for added stability.
- End Support: These are the two vertical pieces that form the ends of the truss, ensuring that the entire structure stays aligned and secure.
The gambrel truss pieces are carefully assembled and connected to create the roof frame. This assembly is key to achieving that classic, barn-style roof with extra space inside.
Once you've got a clear understanding of these truss components, you can move on to cutting and assembling your trusses, knowing exactly how each piece will fit together to form the sturdy roof of your barn-style shed.
How to Decide the Roof Pitches?
When building a gambrel roof, one of the most crucial decisions is determining the roof pitches. The pitches, or angles of the roof, dictate the overall look of the shed and affect how much space you have in the loft area.
A steep pitch offers more storage and headroom, while a shallower pitch creates a more classic barn appearance. The good news is, with the right measurements and careful planning, you can achieve the perfect balance.
Let's break down how to decide the roof pitches and how they influence the structure.
Step 1: Starting the Truss Dimensions
Before you can determine your roof pitches, you'll first need to define the truss dimensions. Measure the overall width and length of your barn-style shed, as this will give you the framework within which the trusses will fit. Your trusses need to match the width of the shed and provide enough support for the roof. Once you know your shed's size, you can start designing your trusses to fit properly.
Step 2: Setting Up the Height of the Truss
The height of the truss is another key factor in determining your roof pitch. The taller the truss, the steeper your roof slope will be. You'll want to choose a height that provides a good balance of headroom in the loft, but without making the roof too steep. Generally, a height of 4 to 6 feet is common for most gambrel roofs. The height will also depend on the materials you're using and the overall aesthetic you want for the shed.
Step 3: Finding the Measurement for the Mid-Line
To find the correct roof pitch, you'll need to calculate the mid-line measurement. This is the horizontal line running along the peak of the roof, from one side of the shed to the other. The mid-line is where the two sloping sides of the roof will meet, and it's crucial to get this measurement correct to ensure the roof is symmetrical.
Step 4: Getting the Mid-Point Measurement
Now that you have the mid-line measurement, it's time to measure the mid-point of the roof. The mid-point is the exact center of the roof, where the steep and shallow slopes will come together. From this point, you can determine the angles of the roof pitches, ensuring that both sides are evenly balanced.
Step 5: Truss Top Measurements
Once you've established the mid-point, you'll need to measure the top of the truss. This will help you define the upper slope of the roof and determine how steep you want that section to be. The truss top measurements directly affect the overall design of the roof, so make sure they align with your desired pitch.
Step 6: Transfer Measurements to 2x4's
With all the measurements in hand, you can now transfer them onto 2x4 lumber. These 2x4's will serve as the basic framework for your trusses. Mark the dimensions clearly on the lumber and make sure everything is accurate before moving forward with assembly.
Step 7: Nail on Gusset Plates
Gusset plates are used to reinforce the joints of the truss. Once you've cut your truss pieces according to the measurements, nail on the gusset plates to connect the pieces securely. This step adds strength and stability to the truss, ensuring that the roof can withstand the weight of the shingles and any other load it will bear.
Step 8: Build a Jig
To make sure all your trusses are identical and correctly aligned, you'll need to build a jig. A jig is a simple frame that holds the truss pieces in place while you assemble them. It ensures that all the angles are consistent and makes it easier to replicate the truss design for each subsequent truss you need to build.
Step 9: Lower Siding, Ceiling Joists, and Loft Flooring
With your trusses ready, you can now focus on the lower siding, ceiling joists, and loft flooring. The ceiling joists provide support for the roof and help distribute the weight evenly. At the same time, you can install the loft flooring if you're planning to use the upper space for storage or as a work area. Ensure that all components are securely fastened and properly aligned.
Step 10: Roof Sheeting
Now comes the fun part: roof sheeting. This is when you start to cover the trusses with plywood or OSB (Oriented Strand Board). Roof sheeting creates a solid base for the shingles and adds extra strength to the structure. Be sure to secure each sheet of roofing material tightly to the trusses.
Step 11: Continue Sheeting the Roof
Once the first layer of sheeting is in place, continue to add more sheets until the entire roof is covered. Make sure there are no gaps between the sheets and that they fit snugly together. This is important for preventing leaks down the line.
Step 12: Venting and Overhangs
Proper venting and overhangs are key to preventing moisture buildup and ensuring good airflow inside your shed. Make sure to leave space for vents in the roof, and if you're adding overhangs, make sure they extend a few inches beyond the walls for protection from rain and sun.
Step 13: Roofing Felt and Drip Edge
To provide an extra layer of protection against water, install roofing felt over the sheeting. Follow this with a drip edge along the edges of the roof to ensure that water flows off the roof and doesn't get trapped at the seams. This step is crucial for maintaining the longevity of your roof.
Step 14: Putting Down Shingles
Finally, you can lay down the shingles. Starting at the bottom edge of the roof, place each row of shingles over the roofing felt and drip edge. Work your way up, overlapping each row slightly to ensure water runs off properly. Once the shingles are in place, you can nail them down securely to complete the roof.
By following these steps carefully, you'll be able to decide on the perfect roof pitches for your gambrel shed, ensuring both beauty and functionality for years to come.
What Can Patiowell Do for You?
Building a barn-style shed with a gambrel roof is a rewarding DIY project, but it requires careful planning and reliable materials. If you're looking for quality, convenience, and a touch of modern design, Patiowell offers a range of outdoor storage solutions that can complement your efforts.
What Patiowell Offers:
- Durable Sheds: Patiowell provides both plastic and metal sheds in various sizes, including 10x12 ft models with gambrel roofs, ideal for creating that classic barn aesthetic.
- Easy Assembly: Their products feature user-friendly designs, such as plug-in structures and full panel mounts, reducing installation time and the number of screws needed.
- Outdoor Living Essentials: Beyond sheds, Patiowell offers deck boxes, motorized market umbrellas, and other outdoor living products to enhance your backyard space.
Whether you're looking to complement your DIY barn-style shed or seeking a ready-made solution, Patiowell provides quality products that cater to your outdoor storage and living needs.
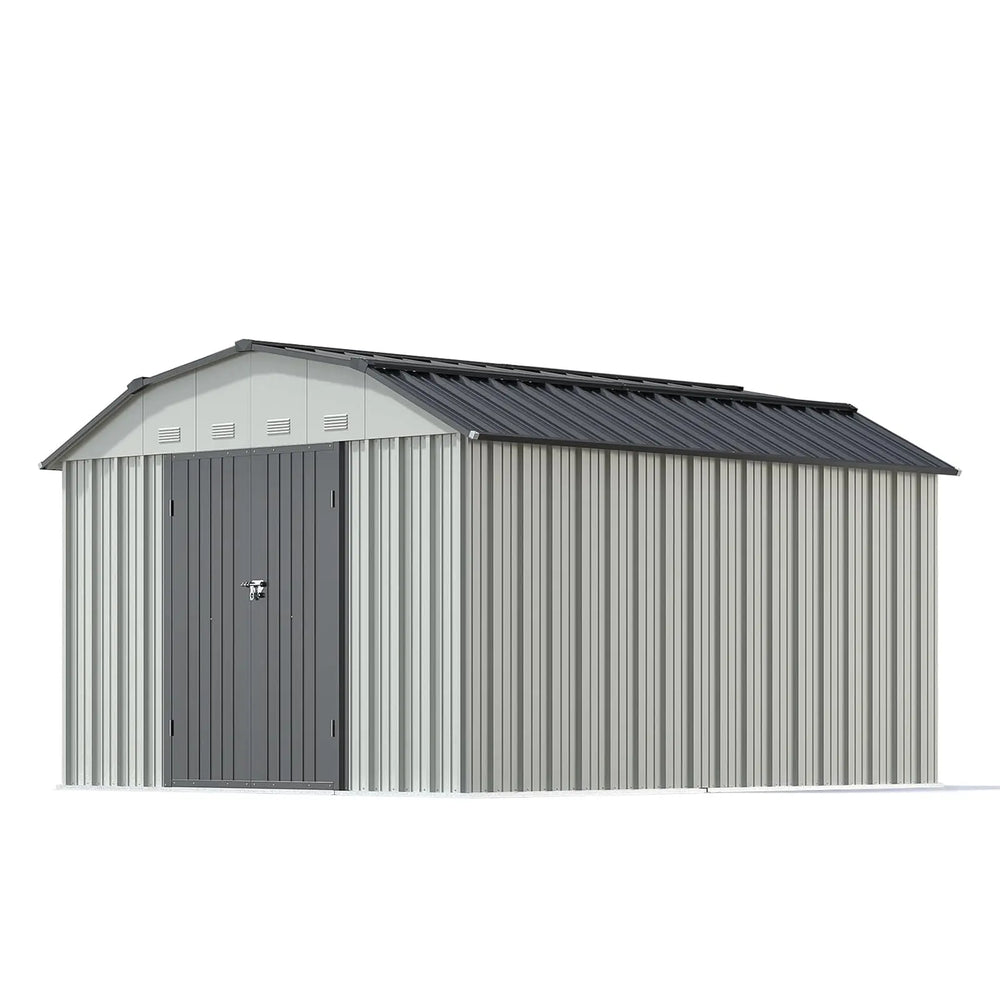
 Barn Style 10x12 Metal Shed Pro with Gambrel Roof
- Ideal for storing larger outdoor equipment or creating a workshop.
- Built with galvanized steel, it is resistant to rust, rot, and harsh weather conditions.
- Offers plenty of space for shelves, hooks, and other organizational solutions.
- The robust metal construction ensures long-lasting protection for your belongings.
Conclusion
Building a barn-style shed with a gambrel roof is a great way to add both functionality and charm to your property. By following the steps outlined in this guide, from measuring your trusses to putting on the shingles, you can create a sturdy and beautiful shed that meets your needs. Remember to take your time with each step and make sure your measurements are accurate.
If you're looking for reliable storage solutions to complement your shed, Patiowell offers durable sheds, easy assembly, and great customer service. Whether you're building from scratch or enhancing your outdoor space, Patiowell has what you need.
With the right tools and materials, you'll have a stunning barn-style shed in no time!
Diana Mason
Hi there! I’m Diana Mason, the chief editor of Patiowell brand. With over 15 years of diving deep into the world of outdoor furniture, I’ve developed a keen eye for what makes outdoor spaces truly special. I love sharing tips and inspiration to help you create your perfect backyard retreat. Our blog is a reflection of my passion and expertise, featuring only the best pieces that I personally vouch for. Thanks for stopping by—I can't wait to help you transform your outdoor living space!
Leave a comment
All comments are moderated before being published.
This site is protected by hCaptcha and the hCaptcha Privacy Policy and Terms of Service apply.